How to create an Ubuntu Server auto-install image for a headless system
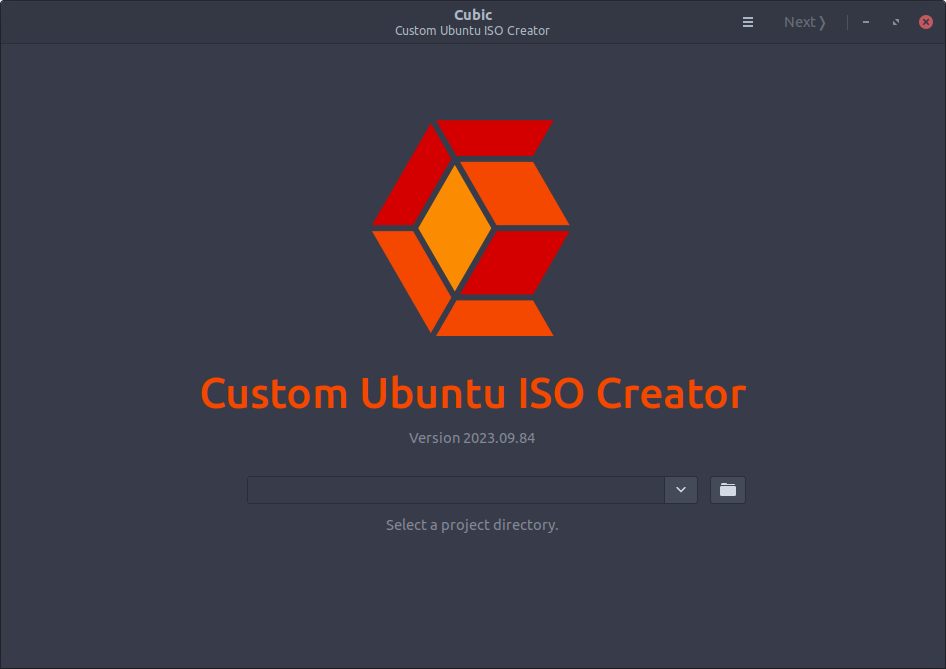
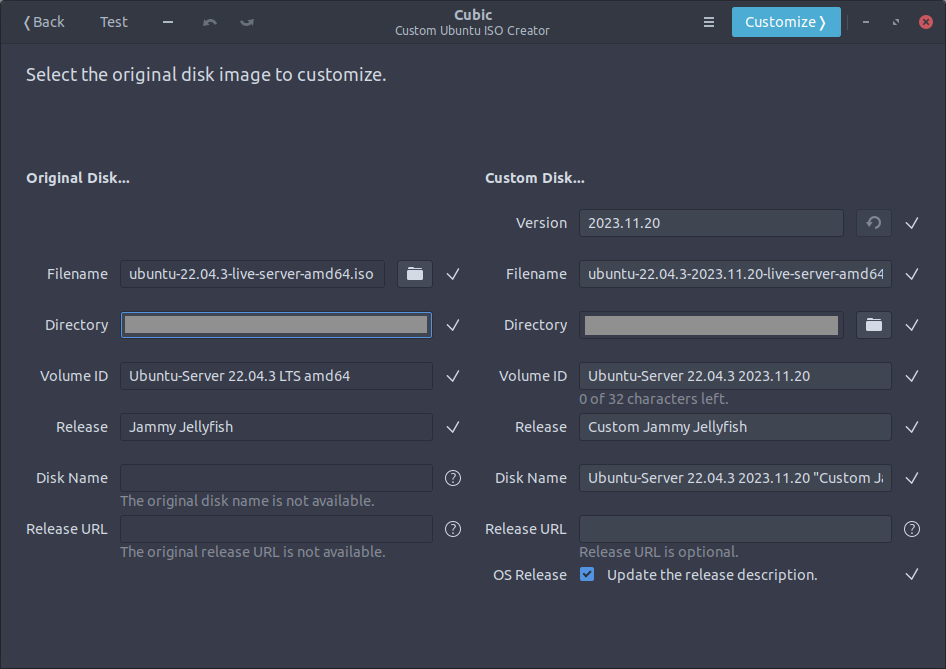
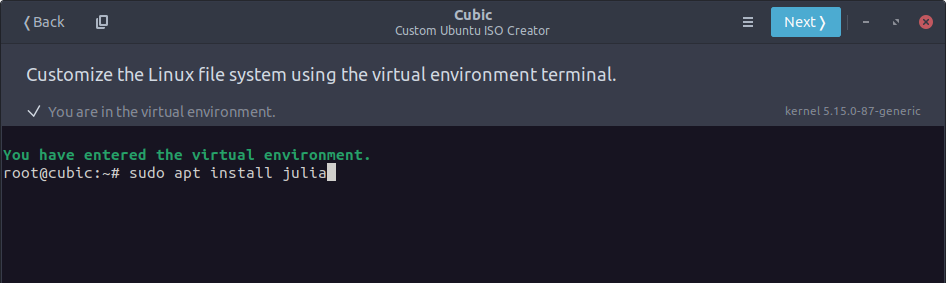
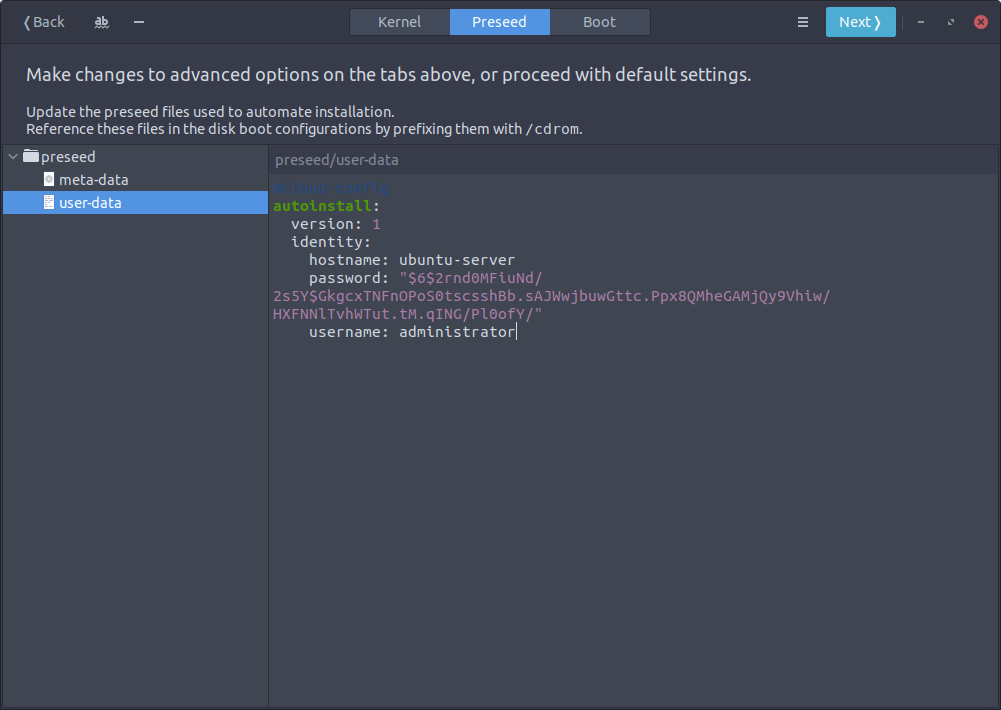
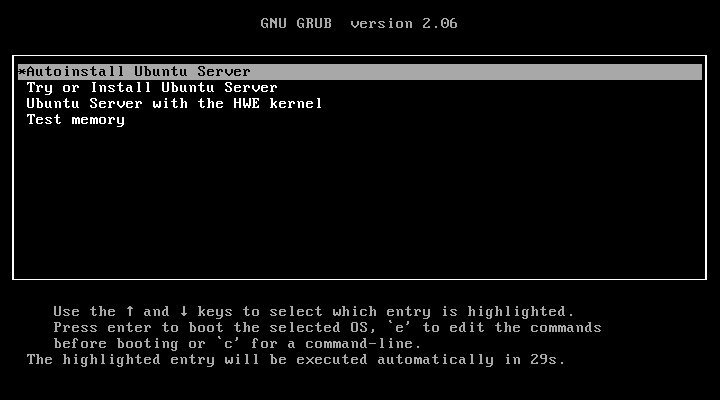
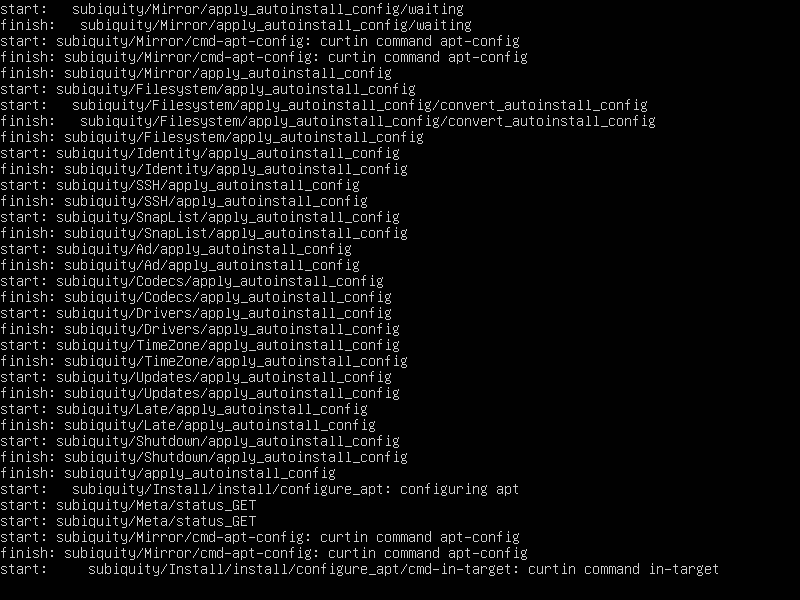
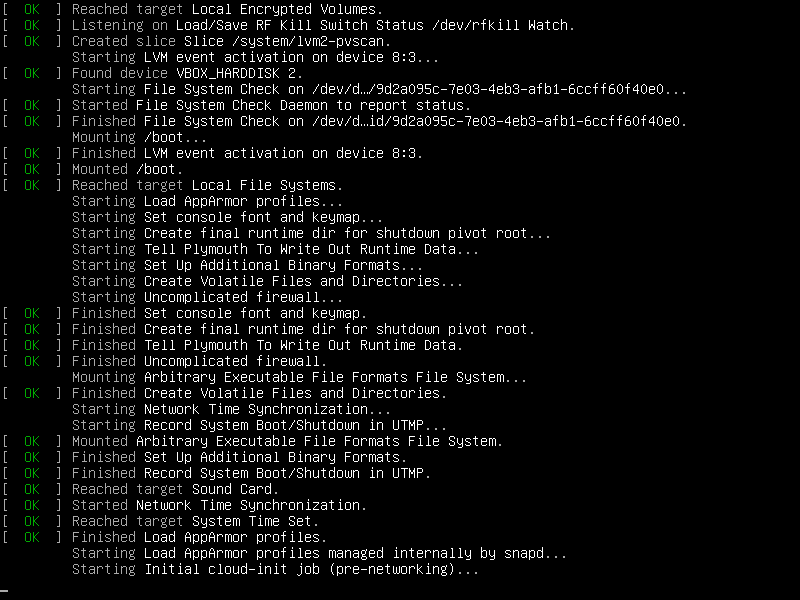
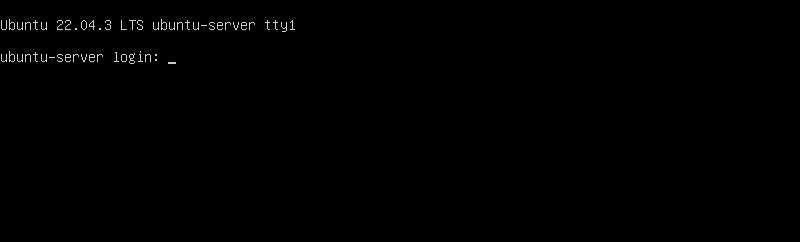
Installing Ubuntu onto a computer is not complicated: One just needs to boot a live image (e.g. from a USB drive or served via the network) and the user is prompted with the option to install Ubuntu onto the host’s internal hard drive. After a few steps, the installation is done and the system is ready. However, this process is interactive, i.e. it requires user input to complete the installation. For example, the user needs to actively select the option to install Ubuntu (otherwise, the image is just run safely as a live system without writing anything to the system’s hard drives) and select a locale or define a password. This is fine as long as there is a) a user and b) input and output devices to interact with the system. But: What, if neither of these exist? There are scenarios, where this is the case, e.g. if you want to remotely install Ubuntu onto a headless server (physical, virtual machine, cloud instance) or set-up many devices in one go that should all be pre-configured and ready to use right away. Then, it may come handy to fully automatize the installation of Ubuntu, without any user interaction, guided by pre-configured settings. The solution to this problem is called autoinstall. Every Ubuntu image already comes with the necessary tools to configure an auto-install. This post explains how to customize a vanilla Ubuntu image using Cubic, so that it will auto-install onto the device it gets booted from, rendering the device ready to login (directly or via First, you need an Ubuntu image. Download it from the Ubuntu website: https://ubuntu.com/download. For this example, we will use an Ubuntu Server image, as our target system is a remote server that does not need to host a GUI. You may as well choose an Ubuntu Desktop image, if that better suits your needs – the procedure described below remains the same. To take apart, edit and rebuild the image, we will use Cubic, a GUI application for creating custom Ubuntu/Debian images. There is a dedicated repository that you can use: Open Cubic and choose a project directory (Fig. 1). On the next screen, select the downloaded Ubuntu On the next screen, Cubic displays a virtual terminal (Fig. 3). You can use it to pre-install software packages, e.g. using If you do not want to add anything specific, you can skip this step. On the next screen, switch to the Preseed tab. Here, one can add files that are saved to the Using the “Create a new file” button in the top row, create a file named In this minimal You may extend this configuration to better suit your needs. More extensive Next, we need to make sure that the above defined In Cubic, switch to the Boot tab (Fig. 5) and navigate to the file This adds a new boot option to the For the Its important to note that you need to escape the Optionally, you may adjust the timer controlling how long After selecting a compression algorithm, Cubic exports the customized image to the project directory as an Done! You may now boot this image on a machine of your choice, e.g. from a USB flash drive or network storage, to auto-install Ubuntu. Note that flashing an autoinstall Ubuntu live image to a USB flash drive and then plugging it into a physical computer is dangerous, as Ubuntu will install itself without user interaction onto that computer if the USB flash drive is booted! Usually, a USB flash drive may not be the default boot option but it could be depending how the computers boot manager was set up. After booting the image, the GRUB boot screen shows the autoinstall entry that we added above as the default option (Fig. 7). As soon as the set timer is up, the kernel is booted with auto-install. You may follow the progress of the installation in case a screen is attached to your system (Fig. 8). When the file system has been created and Ubuntu has been installed to it, the system reboots, now booting from its internal drive (Fig. 9) After the first boot is completed, the login prompt indicates that the system is ready (Fig 10). You may now login to your newly created machine, either directly or via Introduction
ssh) without any interaction during installation.Step 1: Download an Ubuntu image
Step 2: Install Cubic
sudo apt-add-repository universe
sudo apt-add-repository ppa:cubic-wizard/release
sudo apt update
sudo apt install --no-install-recommends cubic
Step 3: Define a project directory and extract the Ubuntu image using Cubic
.iso file. If needed, make adjustments to the meta data of your custom image (Fig. 2).
Step 4: Use the virtual terminal to pre-install software or add files
apt, create directories and files and pre-configure applications that shall be delivered with your custom image. In this how-to, as an example, I am pre-installing the programming language julia using apt.
Step 5: Create a cloud-init config
/preseed directory. There, we will store our cloud-init configuration.meta-data and leave it empty. Create another file named user-data and add the following config to it:#cloud-config
autoinstall:
version: 1
identity:
hostname: ubuntu-server
password: "$6$2rnd0MFiuNd/2s5Y$GkgcxTNFnOPoS0tscsshBb.sAJWwjbuwGttc.Ppx8QMheGAMjQy9Vhiw/HXFNNlTvhWTut.tM.qING/Pl0ofY/"
username: administratorcloud-init configuration, we set ubuntu-server as the name of our new machine and define a user named administrator (Fig. 4). As password, I used ubuntutest which one would use to log in to a machine created using this image. The password must be stored as a hash. To generate one of your own custom password, use openssl passwd -6.user-data config examples can be found in the cloudinit docs.
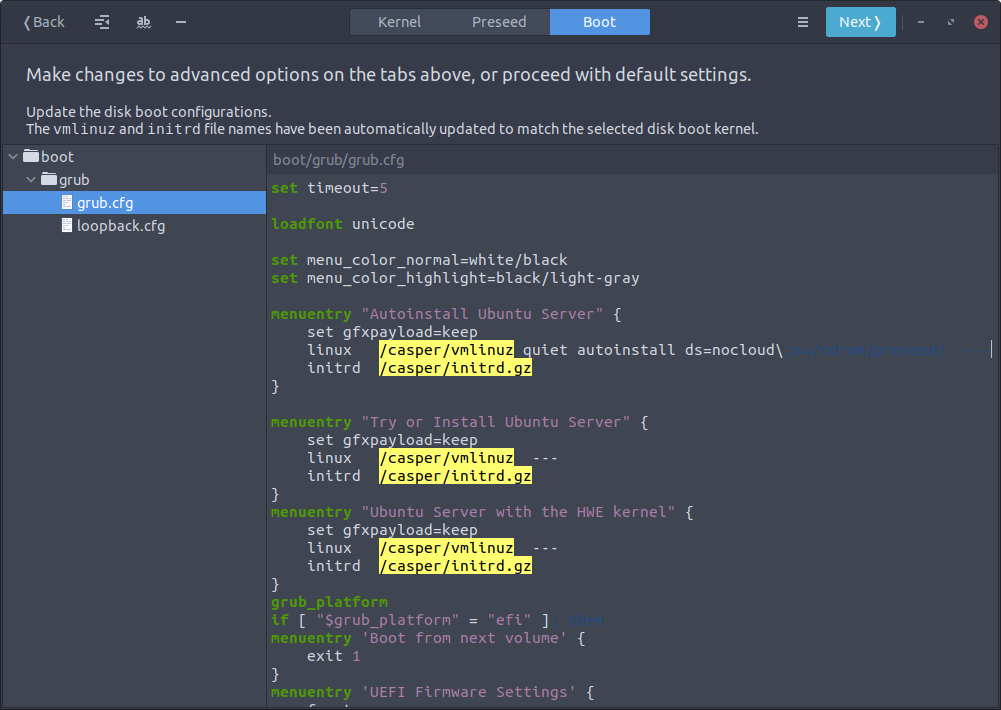
Step 7: Edit the boot configuration
cloud-init config is applied when the live image is booted. For this, we need to edit the bootloader configuration. The default bootloader of Ubuntu is GRUB./boot/grub/grub.cfg. There, add a new menuentry above the ones already present by copying and pasting the below snippet:menuentry "Autoinstall Ubuntu Server" {
set gfxpayload=keep
linux /casper/vmlinuz quiet autoinstall ds=nocloud\;s=/cdrom/preseed/ ---
initrd /casper/initrd.gz
}GRUB boot menu which will be first on the list of options and thus selected by default. The second line inside menuentry instructs GRUB to load the Linux kernel. If you compare our newly added menuentry with the default menuentry that was at the first position before your edit, you see that we added a few cloud-init boot options for the kernel startup. These are:
quiet: disables most log messages.autoinstall: boots kernel in autoinstall modeds=nocloud\;s=/cdrom/preseed/: sets the data source where to get the autoinstall configuration from.ds parameter, we set the option nocloud. With this method, one can set a path (or network address) to the location where the cloud-init configuration resides using the SMBIOS serial number option s of the Linux kernel command line. In our case, the configuration is stored within the live image in the folder /preseed, thus the path to it reads /cdrom/preseed (instead, one could also serve a directory via the network and pass the address to s, e.g. reading http://10.42.42.42/cloud-init/configs/).; character in the GRUB config using \ to pass the SMBIOS option, since in GRUB the semicolon character terminates a command.GRUB should wait for user input until proceeding with the default (first) menu entry. Here, I set the timer to 5 seconds by editing the first line of /boot/grub/grub.cfg as follows:set timeout=5
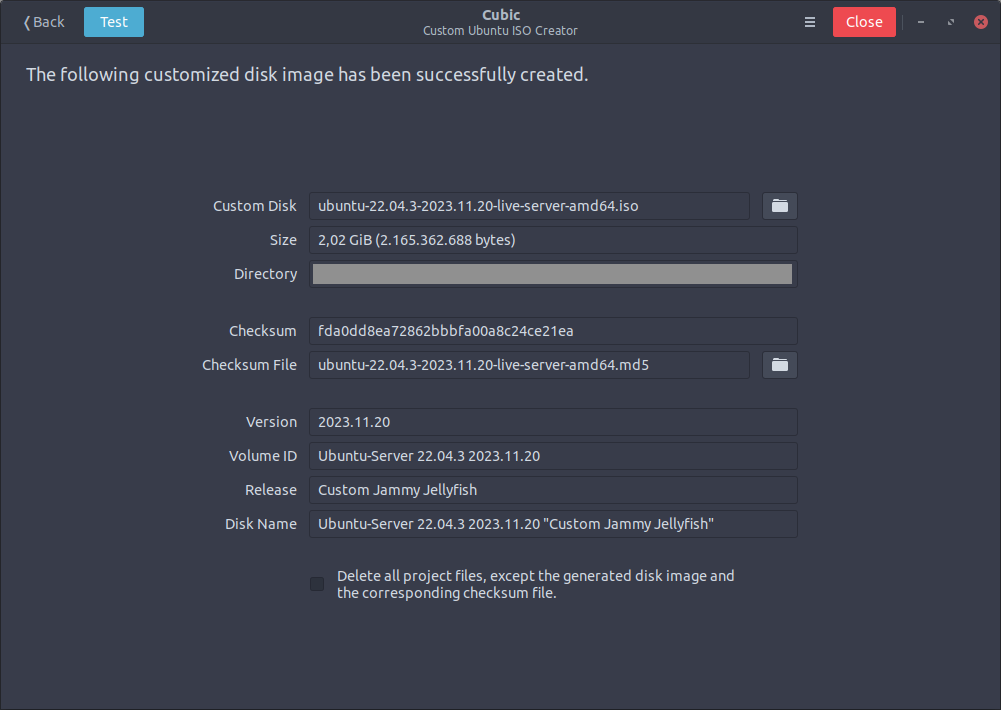
Step 8: Generate customized autoinstall Ubuntu live image
.iso file (Fig. 6).
What it looks like to boot the image
ssh using the credentials configured as user-data above. In case you need to change Ubuntu’s default network configuration, you can do so via the user-data config file.